Subsurface Fertilisation

Value Chain
Climatic Zone
Water Source
Decision Making
Farming Characteristics
Mechanisation
Labour Intensity
Initial Investment
Maintenance Costs
Access to Finance/Credit
Extension Support Required
Access to Inputs
Access to Markets
Gender/Youth Smart
Description

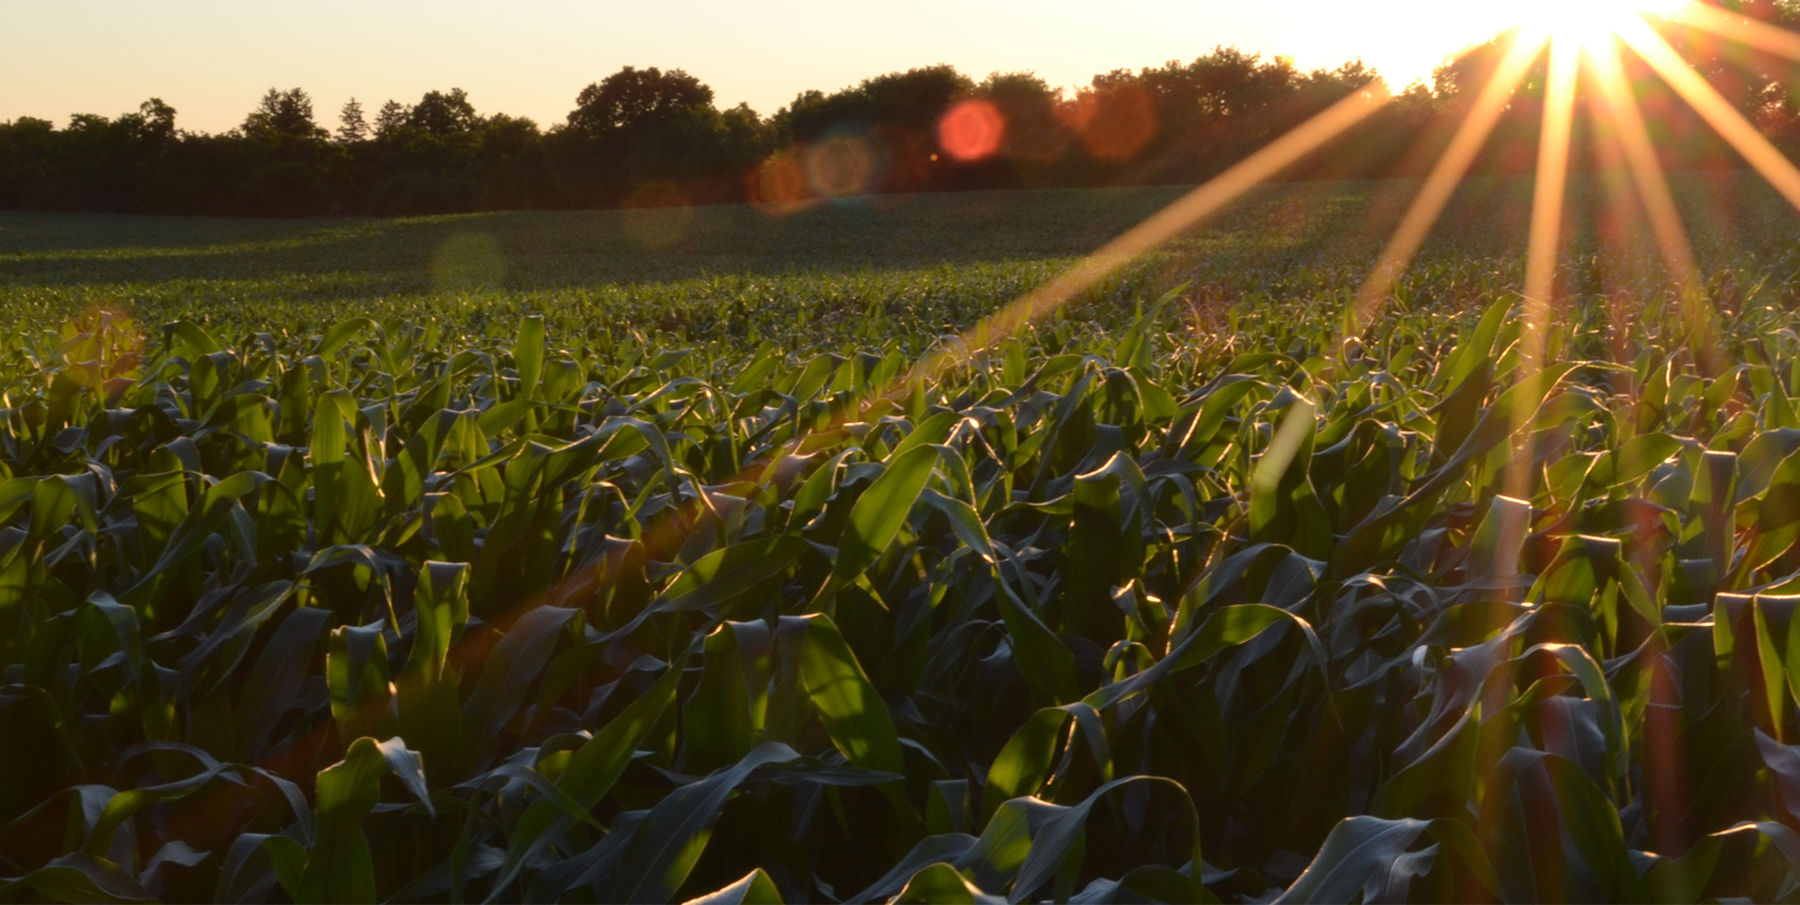
Subsurface fertilisation is the agricultural practice of placing compressed balls of fertiliser, known as briquettes, deep in the soil. The balls of fertiliser are known to gradually release nitrogen, feeding the crops with the desired nutrients. This practice is usually carried out in flooded fields and although originally used for urea application in irrigated rice, it can be used with other fertilisers and crop types. Sub-surface fertilisation prevents the loss of nitrogen during floods as the application is placed 7-10 cm deep in the soil, converted to ammonium, which is much less mobile than nitrates. Only about 4% of nitrogen is lost to the environment when applying in the sub-surface, as compared to 35% when nitrogen is applied using the broadcasting application practice. Urea briquettes are small (~2 cm diameter), and home-made manure briquettes – more practical and applicable for crops other than rice – are larger – up to 10 cm in diameter.

This fertiliser application technique is considered climate smart as it maximises fertiliser inputs, increasing productivity and providing a mechanism for adapting to climate change by amending soil properties to remain productive.

Technical Application

To effectively implement subsurface fertilisation, the following should be carried out. Use of briquette machines to produce 1 to 3 grams of briquettes that are larger than conventional fertiliser granules is recommended:

  • Step 1: Prior to application, dig small holes 7 to 10 centimetres deep along planting rows in drained rice paddy or regular field, ideally located in the centre between a location where four plants will be planted.
  • Step 2: Place the briquettes in the whole, below the soil surface, and cover with dug soil.
  • Step 3: Crops should be planted within seven days of fertiliser application.

Following are the main steps for making your own briquettes. Making briquettes leading up to planting is more effective, as they are not stored for too long. A standard briquette machine can be purchased for between USD 3,000 and USD 6,000.

  • Step 1: Collect manure from cow and/or horse waste.
  • Step 2: Allow the manure to moderately dry (so it is possible to handle), but not for extensive periods, otherwise it will degrade. Keep manure out of direct sunlight, or when processing, remove the outer layer before manufacturing briquettes, and do not leave exposed, especially during rainy periods.
  • Step 3: Press manure into briquettes using briquette press machine – see directions below to make your own home-press.
  • Step 4: Allow the briquettes to dry in a cool, dry location, and store for later use.

To make your own large manure briquette press using household items, follow the instructions below:

  • Step 1: Cut the top off a straight-sided 2-litre plastic soft drink bottle at the top of straight side.
  • Step 2: Obtain a tinned food can that is just smaller than the diameter of the bottle. Preferably leave tin un-opened.
  • Step 3: Line the bottle with a plastic bag.
  • Step 4: Place slightly damp manure (cow, horse or both) inside the bag, inside the bottle, filling the space.
  • Step 5: Place tin on top of manure.
  • Step 6: Place small plank of wood on top of the tin.
  • Step 7: Place your foot on top of the piece of wood, and slowly apply pressure to the tin, pressing the manure down, adding more manure if it compresses further than the depth of the tin.
  • Step 8: When the manure will compress no more, remove plank and tin, and draw the compressed manure from the bottle, removing the plastic bag to reveal a cylinder of compressed manure.
  • Step 9: Slice with a sharp knife to discs 2 to 3 cm thick, and use a piece of 2 cm diameter metal or plastic pipe to punch a hole through each disc. Reuse the
  • Step 10: Allow to air dry as individual rings in a cool dry place. As soon as they are strong enough, you can hang the rings on wire to continue to dry. Use in fields within a month of manufacture. The ring increases surface area, and speeds-up the drying process.
Return on Investment Realisation Period
Crop Production
Fodder Production
Farm Income
Household Workload
Food Security
Soil Quality/Cover
Biological Diversity
Flooding
Crop/Livestock Water Availability
Wind Protection
Erosion Control
Increase Production
A highly effective soil amendment that increases nutrients and organic matter in soil, and in turn productivity.
Increase Resilience
An effective mechanism for amending soil in the face of changing climates.
Mitigate Greenhouse Gas Emissions
If using fertiliser to amend soil, this approach retains substantially more of the fertiliser in the soil to augment nutrients; therefore, is more efficient.
Additional Information
PDF File
/sites/secondsite/files/tb/CCARDESATechnicalBrief_67_SubsurfaceFertilisation_2019-10-17_0.pdf
Benefits and Drawbacks

Benefits

  • This application preserves the nutrients deep in the soil and nourishes the soil making nitrogen available to the crops throughout their growth cycle.
  • Maximises fertiliser application, as little is lost to the atmosphere.
  • Farm waste such as manure can be repurposed into briquettes for subsurface fertiliser application.
  • Can provide a revenue generation opportunity for enterprising community members.

Drawbacks

  • Requires additional labour to gather material, and to make briquettes.
  • There is a financial commitment for purchasing briquette-making equipment.
  • Briquettes can be made by hand, but it requires additional labour and time.

Biological Control of Pests

Value Chain
Climatic Zone
Decision Making
Farming Characteristics
Mechanisation
Labour Intensity
Initial Investment
Maintenance Costs
Access to Finance/Credit
Extension Support Required
Access to Inputs
Access to Markets
Gender/Youth Smart
Description

The use of chemical insecticides and pesticides can be expensive and therefore not an economically viable option for small scale farmers, while also not being climate smart – widespread use of pesticides and herbicides contributes to greenhouse gas emissions. Encouraging natural predators can be an effective method for controlling and managing pests in some instances. With governments across the globe discouraging the use of chemical insecticides and pesticide products, biological control of pests is preferred and encouraged - using living organisms to control pests. Natural predators are insects that feed on pests without damaging the crop and can be found throughout the crops. Encouraging natural predators helps in supressing pests during their early and late lifecycles, improving crop production and reducing pollution caused by pesticides use. The introduction of water-fowl, such ducks in rice systems can be a highly effective form of biological control of pests. They enjoy aquatic habitats, consume insects and can even contribute to weeding as tear up weed plants as they look for food. Insect predators have different roles in controlling pests, there are predators that will control pests in the early pest lifecycle where they feed on their larvae and eggs while some are present at the late pest cycle where they feed on mature insects. Some species of ants are natural predators of stemborer pests, and wasp and some fly species larvae are parasitoids (larvae that feed on a host organism) prey on fall armyworm. One such wasp is the tiny (3 mm in length) Cotesia marginiventris which feeds on FAW caterpillars. The minute (0.5 mm in length) Trichogramma was species lays it’s eggs inside FAW eggs, killing the FAW larvae in the process. Earwigs (Dermaptera: Forficulidae, Carcinophoridae), ground beetles and ladybird beetles are also known to prey on FAW caterpillars. The issue with many of these solutions is volume of consumption, which may be too low to impact an infestation. Ants are the most important predators of FAW, as the communities consume larger quantities of FAW. However, pesticides drastically impact ant populations.

Technical Application

To effectively leverage biological control and encourage natural predators:

  • Step 1: Conduct regular monitoring using field walk-throughs and utilise bottle traps with various lures/baits to identify main pests on crops in order to identify any pests.
  • Step 2: Once the pests have been identified, consult with national research institutes to identify the best natural predators, or biological control agents* to address the particular pests. It is critical to understand what options are available and costs associated with each option.
  • Step 3: Implement according to advice received.
  • Step 4: Monitor progress in terms of reduction in numbers and incidences.
  • Step 5: Adjust the approach based upon observations from the fields.

A farmer must study the lifecycles of insect predators and be aware of pests that feed on his/her crops in order to identify the intervention that will the most effective in controlling pests at difference phases of their lifecycles. Farmers can create welcoming environments for certain predators to attract them to the field area

Return on Investment Realisation Period
Crop Production
Fodder Production
Farm Income
Household Workload
Food Security
Soil Quality/Cover
Biological Diversity
Flooding
Crop/Livestock Water Availability
Wind Protection
Erosion Control
Increase Production
Reducing pests of all kinds can reduce crop and harvest losses.
Increase Resilience
As climate changes, pests and insects will also change. Bottle traps will help.
Additional Information
PDF File
/sites/secondsite/files/tb/CCARDESATechnicalBrief_62_BiologicalControlOfPests_2019-10-17_0.pdf
Benefits and Drawbacks

Benefits

  • Encouraging natural predators helps improve crop production, reduces the use of pesticides which can pollute both the crop and environment.
  • Introducing a natural predator, or biological control agent can reduce the risk of crop failure, and increase agricultural productivity.
  • Archytas, Winthemia and Lespesia flies prey on FAW eggs, with the fly-maggots feeding on the FAW larvae in order to grow. And ants can be highly effective predators of FAW.
  • Ducks are highly effective in rice paddy fields.

Drawbacks

  • Natural predators are often highly specific to a certain predator, and location/geography/climate; hence, research must be done to establish the most effective method of control.
  • Some natural predators do not consume enough prey to reduce infestations, meaning despite best efforts, crops may still fail.

Weeding by Hand/Hoe

Value Chain
Climatic Zone
Decision Making
Farming Characteristics
Mechanisation
Labour Intensity
Initial Investment
Maintenance Costs
Access to Finance/Credit
Extension Support Required
Access to Inputs
Access to Markets
Gender/Youth Smart
Description

A weed plant is an unwanted plant that grows among and competes with crops for water, air, sunlight, nutrients and space. The removal of such plants from fields – known as ‘weeding’ - is vital to enhancing crop growth. They can be removed by cutting their roots either by hand or using an implement such as a hoe. Some cereal crops like rice and maize attract weeds that are herbicide resistant; hence, the use of a hoe in removing the weeds is the most effective practice. However, as mechanic weeding can result in release of weed seeds into the soils as the hoe makes contact with the plant, weeding by-hand is the best way for weed removal to prevent weed seeds from falling onto the ground for further germination; this can increase the labour intensity of weeding considerably. This is a climate smart practice as it mitigates the emission of greenhouse gases from herbicides into the atmosphere, land and water systems. Furthermore, weeding helps maintain sustainable agricultural productivity, when considered an integral part of farm management and operations. However, weeding has been identified as one of the largest labour inputs for subsistence agriculture, accounting for between 30 and 50 % of on-farm labour requirements.

Technical Application

To effectively implement  mechanical weeding:

  • Step 1: Farmers should be able to identify weeds resistance to herbicides.
  • Step 2: Examine fields to understand level of weed infestation – can they be easily and effectively removed using a hoe, without spreading seeds, or will manual weeding be necessary.
  • Step 3: Attempt to quantify the amount of labour needed. Can the work be completed by the adults on the farm, or will additional labour be required? Will youths be involved in weeding? Will they miss school?
  • Step 4: Begin removal of weeds, ensuring that weeds are uprooted and removed from the field to avoid regeneration. A hoe must have a long handle to be able to work effectively and the hoe blade must not be too sharp in order to cut weeds without going through crops and spreading seed and cuttings.
  • Step 5: Weeding should take place a minimum of three times over the growing season – one week before planting crops, three weeks after planting (when the crop has two to three leaves), and two months after planting (milk-stage ). The aim is to reduce or eliminate the product of seeds in the weed plants.
  • Step 6: Draft animal-drawn cultivators can reduce labour requirements but should only be used to cultivate soil to a shallow depth, retaining soil structure, but not disturbing soil. Weeds should be collected by hand afterwards. Deeper tilling or turning of the soil with the wrong implement may cause more harm than good.
  • Step 7: Weeding must be sustained year on year to reduce prevalence. It is important to caution farmers that results may not be seen in significant reduction of plants until year-two of a weeding programme.
  • Step 8: Obnoxious weeds – such as Striga, etc – should be burned once pulled, preferably away from the field, in order to eradicate their presence.
Return on Investment Realisation Period
Crop Production
Fodder Production
Farm Income
Household Workload
Food Security
Soil Quality/Cover
Biological Diversity
Flooding
Crop/Livestock Water Availability
Wind Protection
Erosion Control
Increase Production
Weeding by hand is an effective method of controlling weeds, and ensuring maximum productivity.
Increase Resilience
A regular and diligent weeding strategy will maintain productivity in a changing climate.
Mitigate Greenhouse Gas Emissions
Mitigates emission of greenhouse gases from release of herbicides into the atmosphere.
Additional Information
PDF File
/sites/secondsite/files/tb/CCARDESATechnicalBrief_60_WeedingbyHandHoe_2019-10-17_0.pdf
Benefits and Drawbacks

Benefits

  • Weeding can reduce competition for crops in terms of water, air, sunlight, nutrients and space, making a crop more productive.
  • Weeding is cheaper than the use of herbicides.
  • Weeding by hand or hoe reduces the use of chemicals however, it is as effective as using herbicides.
  • Some weeds produce noxious gases which can have negative impacts on crop growth.

Drawbacks

  • Some of the cereal crops attract weeds that are resistant to herbicides.
  • Manual and mechanical weeding can be physically demanding and may require additional labour resources for larger fields.
  • Manual weeding requires approximately 25 % more labour than using herbicides.

Resistant Varieties

Value Chain
Annual Average Rainfall
Climatic Zone
Decision Making
Farming Characteristics
Mechanisation
Labour Intensity
Initial Investment
Maintenance Costs
Access to Finance/Credit
Extension Support Required
Access to Inputs
Access to Markets
Gender/Youth Smart
Description

Resistant varieties are new crop varieties that improve yield production, are resistant to pests and diseases, more tolerant to drought, salinity or other changing or undesirable environmental conditions. Crop plants used within this practice are usually only resistant to a limited number of undesirable characteristics e.g. pests or drought – but usually not both, and some other desirable traits may be lost while others may be strengthened. Hence, careful selection of candidate species must be undertaken. Resistance varieties common in southern Africa include drought resistant maize, sorghum, rice and cowpea (beneficial legume for intercropping) strains, striga (witch weed) resistant sorghum and maize strains, and others all help farmers adapt to changing climate conditions, by being able to farm crops that survive the increasingly variable climate, which can result in less rainfall, or the presence of new pests. Striga results in crop losses totalling over USD 1 billion per year, whereas research has shown that planting climate resilient maize varieties can lead to up to a 25 % increase in crop yields.

Exploring new pest or drought resistant varieties in a regional will require demonstration and testing in ‘test plots’, so extension workers can ensure that the outcomes are aligned with farmers wants/needs/tastes, and so farmers are familiar with the new varieties before they are mainstreamed. Acceptance of new varieties, and any changes is traits will be critical, as resistant varieties is a key intervention for climate adaptation in southern Africa, as they will allow farmers to remain productive for longer under challenging conditions, and while different crops altogether are investigated.

Technical Application

To effectively leverage resistant varieties, the following should be carried out:

  • Step 1: Survey farmers and meet with other local and national level extension officers to determine key interventions required – drought tolerance, prevalence of certain pests, etc.
  • Step 2: Research and meet other local extension officers to discuss best methods applied to the agricultural practice of resistant varieties in the region.
  • Step 3: Talk to the agricultural dealers and seed manufacturers about the varieties being offered and their characteristics.
  • Step 4: Talk to the agricultural research departments about best opportunities under climatic change in your specific area.
  • Step 5: Either independently or in partnership with seed manufacturers, establish test plots of viable resistant varieties in key locations to act as demonstration plots for farmers to visit, observe growth and harvest, and test the outcomes. Many conditions may come into play when attempting to mainstream resistant varieties, including visual aspects, harvesting and processing differences, palatability and taste, etc. All of these issues must be discussed with farmers during testing and roll-out to ensure resources are not wasted with varieties that will fail.
Return on Investment Realisation Period
Crop Production
Fodder Production
Farm Income
Household Workload
Food Security
Soil Quality/Cover
Biological Diversity
Flooding
Crop/Livestock Water Availability
Wind Protection
Erosion Control
Increase Production
Reduced incidence of pests and disease results in higher yields.
Increase Resilience
Healthier and more pest resilient farm and landscape. Prediction of pest outbreaks enables earlier management decisions.
Mitigate Greenhouse Gas Emissions
Reduced losses result in lowering GHG emissions per tonne produced
Additional Information
PDF File
/sites/secondsite/files/tb/CCARDESATechnicalBrief_57_ResistantVarieties_2019-10-17_0.pdf
Benefits and Drawbacks

Benefits

  • The practice is widely used to increase yield production, produce pest and disease resistant varieties and improve environmental tolerance.
  • Further combines the best traits of the parental forms resulting in some strengths and weaknesses, resulting in a variation of crops species.

Drawbacks

  • May require investment and/or access to credit, as new seeds will not be in farmer seed banks/stores and may be expensive to kick-start implementation.
  • May take time to launch new varieties and gain acceptance from farmers/consumers/markets.

Continuous Long Term Proactive Practices

Climatic Zone
Water Source
Decision Making
Farming Characteristics
Mechanisation
Labour Intensity
Initial Investment
Maintenance Costs
Access to Finance/Credit
Extension Support Required
Access to Inputs
Access to Markets
Gender/Youth Smart
Description

Cultural pest control practices Are pest control management measures to control pests (insects, diseases, weeds) by manipulation of the environment or implementation of preventive practices including using plants that are resistant to pests, raising the mowing height of pastures to shade out weeds, aerating pastures to reduce compaction and plant stress. Several beneficial cultural practices can meet both demands, helping with pest and disease control and minimizing the use of toxic chemicals. In the insect pest management context, cultural practices may be considered as specific crop production practices that may be implemented either in the initial stages of the organic farm plan but also as a continuous plan to reduce the likelihood of insect pest infestation to a crop and damage. They form part of the Integrated Pest management (IPM) Practices and are based on tactics to disrupt pest infestation of crops by having the crop unavailable to pests in space and time, making the crop unacceptable to pests by interfering with host preference or location, reducing pest survival on the crop by enhancing natural enemies, altering the crop’s susceptibility to pests. The tactics or methods used in IPM include one or a combination of the following: Cultural control (crop rotation, use of locally adapted or pest resistant/tolerant varieties, sanitation, manipulating planting/harvest dates to avoid pests). Cultural pest control or IPM results in reduced pests/diseases and increased yields and is a climate-smart practice as its emphasis of prevention helps to control pests and diseases before they occur;  its continuous long-term practices without use of chemicals encourage healthier and more pest resilient crops and landscapes, encouraging the use of beneficial insects  making it an adaptation benefit. The possibility of prediction and recognition of pest outbreaks enables earlier management consultations and decisions. The reduction in losses results in lower GHG emissions per tonne produced.

Technical Application

To effectively implement continuous long-term use of cultural practices, the following steps, as part of the Integrated Pest Management (IPM)  should be carried out, but before taking any pest control action, IPM first sets an action threshold, a point at which pest populations or environmental conditions indicate that pest control action must be taken:

  • Step 1: Inspection. The cornerstone of an effective IPM program is a schedule of regular inspections. This should be regular to identify any new visitors to your crop.
  • Step 2: Preventive Action: regular inspections reveal vulnerabilities in your pest management program, steps can be taken to address them before they cause a real problem. One of the most effective prevention measures is exclusion, i.e., performing structural maintenance e.g by closing potential entry points revealed during inspection thereby physically keeping pests out and hence reducing the need for chemical control.
  • Step 3: Identification: Different pests have different behaviours. By identifying the problematic species, pests can be eliminated more efficiently and with the least risk of harm to other organisms. Professional pest management always starts with the correct identification of the pest in question.
  • Step 4: Analysis: Once you have properly identified the pest, you need to figure out why the pest is in your facility, e.g. food debris or moisture accumulation that may be attracting it? What about odors, through floors or cracks, etc.
  • Step 5: Treatment Selection: Cultural or IPM stresses the use of non-chemical control methods, such as exclusion or trapping, before chemical options. When other control methods have failed or are inappropriate for the situation, chemicals may be used in least volatile formulations in targeted areas to treat the specific pests- use the right treatments in the right places, and only as much as you need to get the job done.
  • Step 6: Monitoring: Constantly monitoring your facility for pest activity and facility and operational changes can protect against infestation and help eliminate existing ones. Your agricultural extension officer can assist you in technical advice to keep pests away.
  • Step 7: Documentation: Up-to-date pest control documentation is important and could include scope of service, pest activity reports, service reports, corrective action reports, trap layout maps, lists of approved pesticides, pesticide usage reports and applicator licenses
Return on Investment Realisation Period
Crop Production
Fodder Production
Farm Income
Household Workload
Food Security
Soil Quality/Cover
Biological Diversity
Flooding
Crop/Livestock Water Availability
Wind Protection
Erosion Control
Increase Production
Reduced incidence of pests and disease results in higher yields.
Increase Resilience
Healthier and more pest resilient farm and landscape. Prediction of pest outbreaks enables earlier management decisions.
Mitigate Greenhouse Gas Emissions
Reduced losses result in lowering GHG emissions per tonne produced.
Additional Information
PDF File
/sites/secondsite/files/tb/CCARDESATechnicalBrief_56_ContiniousLongTermProactivePractices_2019-10-17_0.pdf
Benefits and Drawbacks

Benefits

  • This practice increases yield production, improves soil erosion, enhances soil quality and biological diversity.
  • Reduces pollution of soil, water, allows for pollinating insects to thrive, encourages microbe activity in soil formation

Assists with mitigation of GHG emissions.

Drawbacks

  • Consistent management of pest monitoring, pest prevention and agro-ecosystem management.

Manure Collection, Storage and Treatment

Value Chain
Climatic Zone
Decision Making
Farming Characteristics
Mechanisation
Labour Intensity
Initial Investment
Maintenance Costs
Access to Finance/Credit
Extension Support Required
Access to Inputs
Access to Markets
Gender/Youth Smart
Description

Manure is organic matter that is used as an organic fertiliser in agricultural practices, conditioning and adding nutrients to soil, generally derived from animal faeces. Manure is the best source of fertiliser available to a farmer, as it can be readily available from livestock, and it a more environmentally friendly option over synthetic fertilisers. Animal manure, compost and green manure are the three different types of manure used in soil management. Manure is collected in different forms: liquid manure, slurry manure or solid manure, and treated in different systems depending on its state. Liquid and slurry manure are stored in liquid (slurry) manure storage systems whereas solid manure is stored in sacks in order to allow air and toxic vapours to move in and out, as well as to maintain the moisture content. The manure is collected and treated (as described below) in order to kill pests that may feed on crops during the application period. The manure is further cleaned to remove unwanted substances such as sticks, and large lumps formed in the manure.

Technical Application

To effectively implement manure collection, storage and treatment:

  • Step 1: Use gloves before handling animal manure from any livestock.
  • Step 2: Use shovels and wheel barrows to load and transport the material.
  • Step 3: Store manure in a contained area, with a solid bottom (cement pad) to prevent runoff and leaching into local waterbodies or groundwater.
  • Step 4:  Mix all types of manure with organic substances such as vegetable waste, garden debris, dead leaves, sawdust, wood ash, hay and straw etc. to add structure and other organic compounds to the soil.
  • Step 5: Turn mixed manure over regularly to allow for combining of nutrients and further aeration.
  • Step 6: Cut-up large particles of animal manure to no more than 10 cm in size.
  • Step 7: Spread manure evenly on field a few weeks prior to planting or during planting. It can also be applied in micro-doses around crops and trees directly.
Return on Investment Realisation Period
Crop Production
Fodder Production
Farm Income
Household Workload
Food Security
Soil Quality/Cover
Biological Diversity
Flooding
Crop/Livestock Water Availability
Wind Protection
Erosion Control
Increase Production
Organic matter in manure can be used to fertilise crops, improving soil health and productivity.
Increase Resilience
Manure collection and management can contribute to crop production.
Additional Information
PDF File
/sites/secondsite/files/tb/CCARDESATechnicalBrief_48_ManureCollectionStorageAndTreatment_2019-10-17_0.pdf
Benefits and Drawbacks

Benefits

  • The use of manure helps to maintain the organic-matter content of the soil, which can improve soil structure, increases nutrient availability and crop productivity.
  • An additional benefit is that it increases soil carbon and reduces atmospheric carbon levels.
  • Manure application can be spread across fields or in micro-doses.

Drawbacks

  • Manure leachate can carry concentrated ammonia and other potentially harmful organic compounds. Therefore, it should be contained in one area to prevent possible negative environmental impacts from runoff.

Use of Feed Supplements

Value Chain
Climatic Zone
Water Source
Decision Making
Farming Characteristics
Mechanisation
Labour Intensity
Initial Investment
Maintenance Costs
Access to Finance/Credit
Extension Support Required
Access to Inputs
Access to Markets
Gender/Youth Smart
Description

General Feed Supplements are used to increase nutrients in livestock diets, with the aim of maintaining or improving livestock health through adequate animal nutritional balance and therefore productivity of milk or meat. These supplements include vitamins, amino acids, minerals, and other nutrients. Supplementary feeding can becoming either a regular part of the production cycle to help match feed demand to feed supply, assisting livestock farmers meet production requirements as defined by market specifications, or reserved for times of shortage during dry spells and/or droughts. The extent to which supplementary feeding is applied depends on the farm/business objectives and seasonal conditions. This is especially true in areas of low-quality crop residues and low quality pasture land.

Feed supplements are presented in granular, powder or block form and used during milk production and fattening stages for meat production. However, if consumed in excess feed supplements can be harmful to animals causing toxicity and if persistent, death.

Technical Application

To effectively implement Improved digestibility, Improved protein content:

  • Step 1: Inform farmers of the possible benefits of increased dietary protein in their livestock in order to implement dietary supplements.
  • Step 2: Identify a supplement contain the key amino acids - Methionine, Lysine, Threonine, and Tryptophan, in consultation with suppliers and veterinarians.
  • Step 3: Added supplements to green plant residue (silage) as guided on packaging or by supplier to increase the efficiency of protein in livestock. Ensure that supplement amounts are suitable for animals and the type of feed being supplemented.
  • Step 4: Ensure that supplements sourced will be consistently available from suppliers in the region. These supplements can be purchased at most agricultural shops, including rural areas.
  • Step 5: As a low-cost option, farmers can formulate rations specific to their livestock. These rations are only for domestic use and not commercial.
Return on Investment Realisation Period
Crop Production
Fodder Production
Farm Income
Household Workload
Food Security
Soil Quality/Cover
Biological Diversity
Flooding
Crop/Livestock Water Availability
Wind Protection
Erosion Control
Increase Production
Can supplement conventional feed to enhance productivity
Increase Resilience
Can help livestock get through lean periods by preserving fodder.
Additional Information
PDF File
/sites/secondsite/files/tb/CCARDESATechnicalBrief_42_UseofFeedSupplements_2019-10-17_0.pdf
Benefits and Drawbacks

Benefits

  • Feed supplements are used to balance animal nutrition, resulting in high market value and quality of livestock.
  • They help improve animal productivity and nutrition.
  • Beneficial in areas of poor pasture or during drought seasons where animal feeds are scarce.

Drawbacks

  • Excessive consumption of supplements can be toxic to animals and can lead to death if over consumption persists.

Improved Digestibility, Improved Protein Content

Value Chain
Climatic Zone
Water Source
Decision Making
Farming Characteristics
Mechanisation
Labour Intensity
Initial Investment
Maintenance Costs
Access to Finance/Credit
Extension Support Required
Access to Inputs
Access to Markets
Gender/Youth Smart
Description

Improved protein content in animal feed can positively impact productivity, such as the quality and quantity of meat and milk.  With the increase in global demand for meat and dairy products, the increase of protein in livestock diets is extremely important. Key to the absorption of protein in livestock diets is the improved digestibility of protein. For protein to be utilised efficiently by livestock i.e. consumed and converted into body protein and resulting in bigger and better-quality meat, certain amino acids need to be present. Thus, to maximise protein deposition in livestock, the required amino acids must also be included in the feed. Amino acids have been added to livestock feed for over 40-years. The most common amino acids added to feeds are Methionine, Lysine, Threonine, and Tryptophan. With the expansion of inexpensive plant-based proteins (soybeans etc.) and increasing demands for meat, plant-based proteins offer an alternative or supplement to amino-acids, contributing to greater efficiency of conversion of proteins from feed to meat. Plant-based proteins also require less monitoring than synthetic additives, but amino acids are often needed to maintain digestibility. Improved livestock productivity and conversion is climate smart because there is more efficient conversion of food to weight gain and less livestock pressure on land, supporting a more efficient value chain.

Technical Application

To effectively implement Improved digestibility, Improved protein content:

  • Step 1: Inform farmers of the possible benefits of increased dietary protein in their livestock in order to implement dietary supplements.
  • Step 2: Identify a supplement contain the key amino acids - Methionine, Lysine, Threonine, and Tryptophan, in consultation with suppliers and veterinarians.
  • Step 3: Added supplements to green plant residue (silage) as guided on packaging or by supplier to increase the efficiency of protein in livestock. Ensure that supplement amounts are suitable for animals and the type of feed being supplemented.
  • Step 4: Ensure that supplements sourced will be consistently available from suppliers in the region. These supplements can be purchased at most agricultural shops, including rural areas.
  • Step 5: As a low-cost option, farmers can formulate rations specific to their livestock. These rations are only for domestic use and not commercial.
Return on Investment Realisation Period
Crop Production
Fodder Production
Farm Income
Household Workload
Food Security
Soil Quality/Cover
Biological Diversity
Flooding
Crop/Livestock Water Availability
Wind Protection
Erosion Control
Increase Production
Less feed is required to reach the same levels of production. Potentially this means less livestock pressure on land.
Increase Resilience
Less is required to reach the same levels of production. Potentially this means less livestock pressure on land.
Additional Information
PDF File
/sites/secondsite/files/tb/CCARDESATechnicalBrief_41_ImprovedDigestibilityImproved_2019-10-17_0.pdf
Benefits and Drawbacks

Benefits

  • Protein absorption in livestock contributes to increased meat and milk production.
  • Less livestock pressure on land.

Drawbacks

  • Synthetic amino acids require constant monitoring.

Non-Conventional Feeds

Value Chain
Climatic Zone
Water Source
Decision Making
Farming Characteristics
Mechanisation
Labour Intensity
Initial Investment
Maintenance Costs
Access to Finance/Credit
Extension Support Required
Access to Inputs
Access to Markets
Gender/Youth Smart
Description

Non-Conventional Feeds (NCF) are either traditional or commercial animal feed-types that are not traditionally utilised as animal feed. These feeds are generally in one of two categories: by-products of agroecological industrial processes, or plants/plant materials from other processes. Examples of industrial by-products include groundnut cake, molasses and cotton seed meal, which are outputs from other processes and are found in proximity of manufacturing points, but often have a short shelf-life. Plant materials can be vegetable peels or locally available crop residues such as maize stalks and other remaining parts of harvested plants not consumed by humans. NCF decrease the demand of land to grow fodder, act as an alternative source for animal feed, resulting in the decrease of food competition between animals and humans ensuring food security. Furthermore, the use of bi-products optimises the use of raw materials and can increase profitability for the producer and the farmer.

Technical Application

To effectively implement NCF practices:

  • Step 1: Determine potential sources of NCFs in the local area and consider if the potential products are suitable (provide enough energy, are digestible, palatable to livestock animals, etc) and require additional investment to access or use.
  • Step 2: Collect for free/negotiate lower rates with producers of agroecological industrial process biproducts or plant materials to gain access to their ‘waste’ materials.
  • Step 3: Determine how sustainable and consistent the supply will be from the providers. If possible, identify a range of suppliers to mitigate potential losses of stockpiled NCFs.
  • Step 4: Before being used as feed, NCF’s from agroecological processes must be appropriately processed - (grinding (8 mm) and pelleting) and mixed into a uniform blend. Hence, labour requirements may increase. This could be mechanised.
  • Step 5: Livestock should be monitored when these feeds are introduced to ensure digestibility of the product for the animals.
  • Step 6: Based on advice from the suppliers of agroecological industrial process biproducts, ensure appropriate storage of materials to avoid loss of nutrition, pests and waste.
Return on Investment Realisation Period
Crop Production
Fodder Production
Farm Income
Household Workload
Food Security
Soil Quality/Cover
Biological Diversity
Flooding
Crop/Livestock Water Availability
Wind Protection
Erosion Control
Increase Production
Can supplement conventional feed to enhance productivity.
Increase Resilience
Reduces pressure on land to produce fodder.
Mitigate Greenhouse Gas Emissions
As these are by-products of industrial processes, no additional inputs to produce fodder are required.
Additional Information
PDF File
/sites/secondsite/files/tb/CCARDESATechnicalBrief_40_NonConventionalFeeds_2019-10-17_0.pdf
Benefits and Drawbacks

Benefits

  • The use of NCFs could be a cheap and good source of nutrients for livestock.
  • NCF act as an alternative source for animal feed, resulting in a decrease of food competition between animals and humans.

Drawbacks

  • NCF’s need to be handled properly to avoid formation of moulds that are not good for animal health.
  • Farmers need to acquire skills on how best to conserve these residues for animal consumption, like drying before storing to avoid the loss of nutritional value.

Physical Storage Options

Value Chain
Climatic Zone
Decision Making
Farming Characteristics
Mechanisation
Labour Intensity
Initial Investment
Maintenance Costs
Access to Finance/Credit
Extension Support Required
Access to Inputs
Access to Markets
Gender/Youth Smart
Description

Grains are stored to reduce the opportunities for loss, damage or infestation by pests. On the farm grain storage can be short-term (>3 months) before it is moved to the supply chain, long term (3-12 months) while farmers store it for home consumption, to sell when prices are more favourable or for planting in the next season. During this phase of post-harvest processing, grains can be stored in bags, silos or other bulk storage containers. Bag storage utilises permeable sacks that will allow air movement in and out of the bag. Structures can be built to store grains and solid-wall bins or silos should be used in areas where grains can be dried properly. Other options include airtight underground pits, steel bins, while concrete silos and warehouses can also be used as storage options. While storing grains to ensure favourable storage, facilities should be kept clean, covered, and never exposed to the elements.  However, pest control measures need to be established, such as adhering to acceptable grain moisture content levels at storage to deter insect infestation, as pests (rodents, insects, etc.) can devastate grains in storage. Physical storage options are built to meet the demand and supply of grains season-to-season and to make seeds available for the next planting season.

Technical Application

To effectively implement Physical Storage Options:

  • Step 1: When making a choice of which storage option to choose, farmers must consider the type of crop to be stored, storage requirements of the crop and the form in which the crop must be stored (for 0-6months/3-12months).
  • Step 2: Grains must be stored in a dry place with a constant temperature.
  • Step 3: Crops should be dried and have low moisture content prior to storage.
  • Step 4: Airtight containers should be used to avoid insect infestation.
  • Step 5: Based on farmer resources and time of storage, there are a number of containers that can be utilised to store harvested crops including metal silos, polythene sacks (that can be layered), mud silos, plastic bags.
  • Step 6: As a last measure, insecticides in the form of a powder can be applied to harvested crops. The powder comes in pre-measured packets and are low dosage so generally safe to handle. Information is provided on each packet and should be read before integrating it into the crop. Grain needs to be cleaned before consumption.
Return on Investment Realisation Period
Crop Production
Fodder Production
Farm Income
Household Workload
Food Security
Soil Quality/Cover
Biological Diversity
Flooding
Crop/Livestock Water Availability
Wind Protection
Erosion Control
Increase Production
Reduces losses during storage.
Increase Resilience
Storage that is protected from flooding, extreme rain and heat will protect grain. Potential to store until prices are higher and increase income.
Mitigate Greenhouse Gas Emissions
More efficient use of resources.
Additional Information
PDF File
/sites/secondsite/files/tb/CCARDESATechnicalBrief_39_PhyscialStorageOptions_0.3_2019-07-18_0.pdf
Benefits and Drawbacks

Benefits

  • Storage options can support food security and assist farmers respond to supply and demand, leveraging favourable market prices and conditions.
  • Suitable for short- and long-term storage.

Drawbacks

  • Uncontrolled grain moisture may lead to insect infestation and loss in grain.
  • Insect fumigation may contaminate grains.
Subscribe to Short

Funding Partners

4.61M

Beneficiaries Reached

97000

Farmers Trained

3720

Number of Value Chain Actors Accessing CSA

41300

Lead Farmers Supported