Resistant Varieties

Value Chain
Annual Average Rainfall
Climatic Zone
Decision Making
Farming Characteristics
Mechanisation
Labour Intensity
Initial Investment
Maintenance Costs
Access to Finance/Credit
Extension Support Required
Access to Inputs
Access to Markets
Gender/Youth Smart
Description

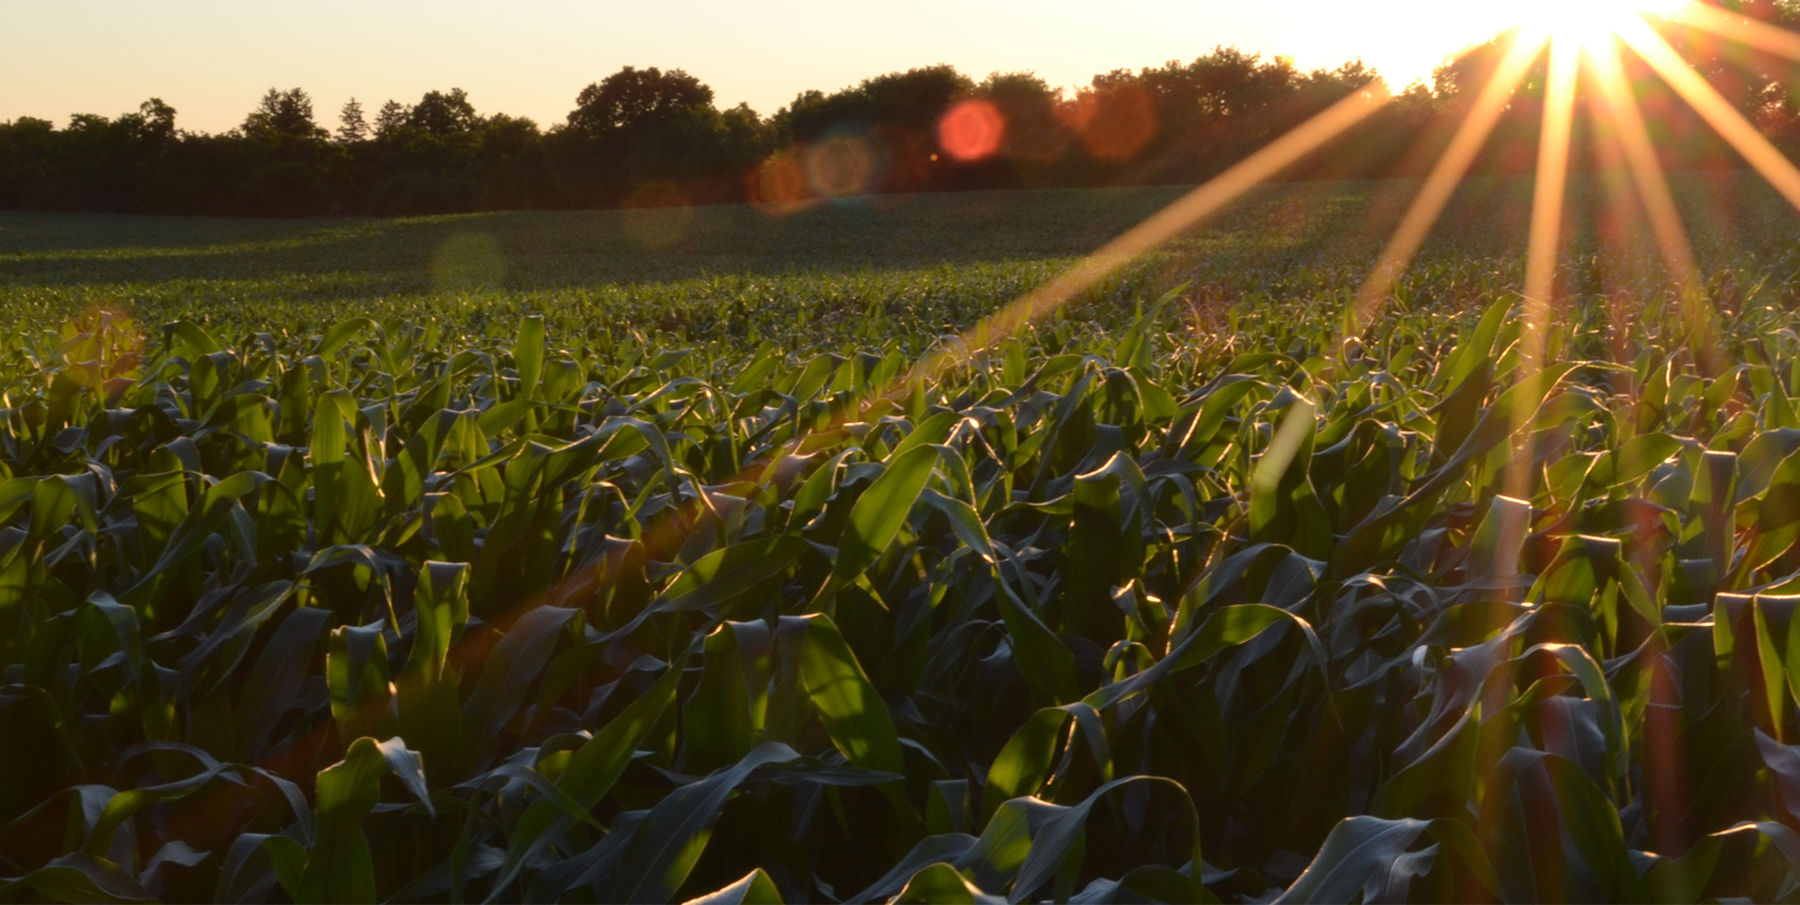
Resistant varieties are new crop varieties that improve yield production, are resistant to pests and diseases, more tolerant to drought, salinity or other changing or undesirable environmental conditions. Crop plants used within this practice are usually only resistant to a limited number of undesirable characteristics e.g. pests or drought – but usually not both, and some other desirable traits may be lost while others may be strengthened. Hence, careful selection of candidate species must be undertaken. Resistance varieties common in southern Africa include drought resistant maize, sorghum, rice and cowpea (beneficial legume for intercropping) strains, striga (witch weed) resistant sorghum and maize strains, and others all help farmers adapt to changing climate conditions, by being able to farm crops that survive the increasingly variable climate, which can result in less rainfall, or the presence of new pests. Striga results in crop losses totalling over USD 1 billion per year, whereas research has shown that planting climate resilient maize varieties can lead to up to a 25 % increase in crop yields.

Exploring new pest or drought resistant varieties in a regional will require demonstration and testing in ‘test plots’, so extension workers can ensure that the outcomes are aligned with farmers wants/needs/tastes, and so farmers are familiar with the new varieties before they are mainstreamed. Acceptance of new varieties, and any changes is traits will be critical, as resistant varieties is a key intervention for climate adaptation in southern Africa, as they will allow farmers to remain productive for longer under challenging conditions, and while different crops altogether are investigated.

Technical Application

To effectively leverage resistant varieties, the following should be carried out:

  • Step 1: Survey farmers and meet with other local and national level extension officers to determine key interventions required – drought tolerance, prevalence of certain pests, etc.
  • Step 2: Research and meet other local extension officers to discuss best methods applied to the agricultural practice of resistant varieties in the region.
  • Step 3: Talk to the agricultural dealers and seed manufacturers about the varieties being offered and their characteristics.
  • Step 4: Talk to the agricultural research departments about best opportunities under climatic change in your specific area.
  • Step 5: Either independently or in partnership with seed manufacturers, establish test plots of viable resistant varieties in key locations to act as demonstration plots for farmers to visit, observe growth and harvest, and test the outcomes. Many conditions may come into play when attempting to mainstream resistant varieties, including visual aspects, harvesting and processing differences, palatability and taste, etc. All of these issues must be discussed with farmers during testing and roll-out to ensure resources are not wasted with varieties that will fail.
Return on Investment Realisation Period
Crop Production
Fodder Production
Farm Income
Household Workload
Food Security
Soil Quality/Cover
Biological Diversity
Flooding
Crop/Livestock Water Availability
Wind Protection
Erosion Control
Increase Production
Reduced incidence of pests and disease results in higher yields.
Increase Resilience
Healthier and more pest resilient farm and landscape. Prediction of pest outbreaks enables earlier management decisions.
Mitigate Greenhouse Gas Emissions
Reduced losses result in lowering GHG emissions per tonne produced
Additional Information
PDF File
/sites/secondsite/files/tb/CCARDESATechnicalBrief_57_ResistantVarieties_2019-10-17_0.pdf
Benefits and Drawbacks

Benefits

  • The practice is widely used to increase yield production, produce pest and disease resistant varieties and improve environmental tolerance.
  • Further combines the best traits of the parental forms resulting in some strengths and weaknesses, resulting in a variation of crops species.

Drawbacks

  • May require investment and/or access to credit, as new seeds will not be in farmer seed banks/stores and may be expensive to kick-start implementation.
  • May take time to launch new varieties and gain acceptance from farmers/consumers/markets.

Continuous Long Term Proactive Practices

Climatic Zone
Water Source
Decision Making
Farming Characteristics
Mechanisation
Labour Intensity
Initial Investment
Maintenance Costs
Access to Finance/Credit
Extension Support Required
Access to Inputs
Access to Markets
Gender/Youth Smart
Description

Cultural pest control practices Are pest control management measures to control pests (insects, diseases, weeds) by manipulation of the environment or implementation of preventive practices including using plants that are resistant to pests, raising the mowing height of pastures to shade out weeds, aerating pastures to reduce compaction and plant stress. Several beneficial cultural practices can meet both demands, helping with pest and disease control and minimizing the use of toxic chemicals. In the insect pest management context, cultural practices may be considered as specific crop production practices that may be implemented either in the initial stages of the organic farm plan but also as a continuous plan to reduce the likelihood of insect pest infestation to a crop and damage. They form part of the Integrated Pest management (IPM) Practices and are based on tactics to disrupt pest infestation of crops by having the crop unavailable to pests in space and time, making the crop unacceptable to pests by interfering with host preference or location, reducing pest survival on the crop by enhancing natural enemies, altering the crop’s susceptibility to pests. The tactics or methods used in IPM include one or a combination of the following: Cultural control (crop rotation, use of locally adapted or pest resistant/tolerant varieties, sanitation, manipulating planting/harvest dates to avoid pests). Cultural pest control or IPM results in reduced pests/diseases and increased yields and is a climate-smart practice as its emphasis of prevention helps to control pests and diseases before they occur;  its continuous long-term practices without use of chemicals encourage healthier and more pest resilient crops and landscapes, encouraging the use of beneficial insects  making it an adaptation benefit. The possibility of prediction and recognition of pest outbreaks enables earlier management consultations and decisions. The reduction in losses results in lower GHG emissions per tonne produced.

Technical Application

To effectively implement continuous long-term use of cultural practices, the following steps, as part of the Integrated Pest Management (IPM)  should be carried out, but before taking any pest control action, IPM first sets an action threshold, a point at which pest populations or environmental conditions indicate that pest control action must be taken:

  • Step 1: Inspection. The cornerstone of an effective IPM program is a schedule of regular inspections. This should be regular to identify any new visitors to your crop.
  • Step 2: Preventive Action: regular inspections reveal vulnerabilities in your pest management program, steps can be taken to address them before they cause a real problem. One of the most effective prevention measures is exclusion, i.e., performing structural maintenance e.g by closing potential entry points revealed during inspection thereby physically keeping pests out and hence reducing the need for chemical control.
  • Step 3: Identification: Different pests have different behaviours. By identifying the problematic species, pests can be eliminated more efficiently and with the least risk of harm to other organisms. Professional pest management always starts with the correct identification of the pest in question.
  • Step 4: Analysis: Once you have properly identified the pest, you need to figure out why the pest is in your facility, e.g. food debris or moisture accumulation that may be attracting it? What about odors, through floors or cracks, etc.
  • Step 5: Treatment Selection: Cultural or IPM stresses the use of non-chemical control methods, such as exclusion or trapping, before chemical options. When other control methods have failed or are inappropriate for the situation, chemicals may be used in least volatile formulations in targeted areas to treat the specific pests- use the right treatments in the right places, and only as much as you need to get the job done.
  • Step 6: Monitoring: Constantly monitoring your facility for pest activity and facility and operational changes can protect against infestation and help eliminate existing ones. Your agricultural extension officer can assist you in technical advice to keep pests away.
  • Step 7: Documentation: Up-to-date pest control documentation is important and could include scope of service, pest activity reports, service reports, corrective action reports, trap layout maps, lists of approved pesticides, pesticide usage reports and applicator licenses
Return on Investment Realisation Period
Crop Production
Fodder Production
Farm Income
Household Workload
Food Security
Soil Quality/Cover
Biological Diversity
Flooding
Crop/Livestock Water Availability
Wind Protection
Erosion Control
Increase Production
Reduced incidence of pests and disease results in higher yields.
Increase Resilience
Healthier and more pest resilient farm and landscape. Prediction of pest outbreaks enables earlier management decisions.
Mitigate Greenhouse Gas Emissions
Reduced losses result in lowering GHG emissions per tonne produced.
Additional Information
PDF File
/sites/secondsite/files/tb/CCARDESATechnicalBrief_56_ContiniousLongTermProactivePractices_2019-10-17_0.pdf
Benefits and Drawbacks

Benefits

  • This practice increases yield production, improves soil erosion, enhances soil quality and biological diversity.
  • Reduces pollution of soil, water, allows for pollinating insects to thrive, encourages microbe activity in soil formation

Assists with mitigation of GHG emissions.

Drawbacks

  • Consistent management of pest monitoring, pest prevention and agro-ecosystem management.

Biological Control Vectors

Value Chain
Climatic Zone
Decision Making
Farming Characteristics
Mechanisation
Labour Intensity
Initial Investment
Maintenance Costs
Access to Finance/Credit
Extension Support Required
Access to Inputs
Access to Markets
Gender/Youth Smart
Description

Vectors are organisms that carry diseases from one living being to another without showing symptoms of the diseases themselves. Some of the most common forms of vectors are blood sucking insects such as mosquitos, fleas, lice, ticks and other similar insects, and rats/rodents. Places such as stagnant water and dumping sites can be ideal habitats for vectors to reside and transmit. The use of natural vector predators can help reduce or eliminate vector populations. The most common vectors in southern Africa are insects (tsetse flies-trypanosomiasis), animals (foot and mouth disease through cattle or people with contaminated shoes), tick-borne relapsing fever (TBRF) and Crimean-Congo haemorrhagic fever (CCHF).  Sanitising the life-cycle of vectors, implementing pest traps and introducing pest predators are means of reducing the spread of disease. The impacts of climate change, especially increased heavy rainfall and higher temperatures can encourage vector populations to grow quicker than normal. Simple strategies to control vectors includes keeping livestock surroundings clean, avoiding livestock access to stagnant water, fencing areas off, restricting animal access to certain locations, can all control biological vectors and assist in reducing vector spread.

Technical Application

To effectively implement biological control vectors:

  • Step 1: Research common vectors in the local area and ensure that farmers are informed about the kinds, description, lifecycle and common habitats of these vectors, such as tsetse flies, ticks, biting flies.
  • Step 2: Avoid allowing livestock access to dirty and damp environments as well as very bushy areas as these locations are common habitats for vectors.
  • Step 3: Use of traps or even introduction of vector predators to livestock to manage vector spread could be used. This could include introducing epsilon traps for tsetse flies to promote vector control.
  • Step 4: If rodents are found in or around livestock, introduce rodent control methods such as traps and/or rodent predators (cats, etc) and bury any remains far from livestock areas.
  • Step 5: Fence off areas of high vector prevalence, such as stagnant water, ensuring that livestock do not access these areas.
  • Step 6: Examine any rangeland to determine whether there are vectors in the vicinity such as biting insect, or locusts that may damage maize crops and fruit flies that damage tomatoes.
  • Step 7: Community radio can be an effective method for extension officers to inform communities about outbreaks, or impending infestations.
Return on Investment Realisation Period
Crop Production
Fodder Production
Farm Income
Household Workload
Food Security
Soil Quality/Cover
Biological Diversity
Flooding
Crop/Livestock Water Availability
Wind Protection
Erosion Control
Increase Production
Reduces incidence of disease results in healthier, more productive animals.
Increase Resilience
Reduces risk of secondary infections in livestock. Sale of livestock is a common coping strategy so having more/better livestock to sell increases resilience.
Mitigate Greenhouse Gas Emissions
Potential for more efficient conversion of feed into meat/diary which can reduce emissions per unit production.
Additional Information
PDF File
/sites/secondsite/files/tb/CCARDESATechnicalBrief_53_BiologicalControlVectors_2019-10-17_0.pdf
Benefits and Drawbacks

Benefits

  • Identifying the common vectors in the area is a key first step to understanding how to manage them.
  • Using vector traps and introducing vector predators can also help manage livestock exposure.

Drawbacks

  • Biological vectors transport disease that can have devastating impacts on livestock.

Hybridisation Traditional Breeds

Value Chain
Climatic Zone
Decision Making
Farming Characteristics
Mechanisation
Labour Intensity
Initial Investment
Maintenance Costs
Access to Finance/Credit
Extension Support Required
Access to Inputs
Access to Markets
Gender/Youth Smart
Description

Hybridisation is the agricultural practice of genetically manipulating flora and fauna that differ in heredity. Hybridisation and mutations are the main source of hereditary variation and can result in the increased growth rate, manipulated gender ratios, increased yields, sterile animals, improved flesh quality, increase disease resistance and improve environmental tolerance. Intraspecific hybridisation method is used for livestock breeding whereby individuals of different breeds or strains are mated. Distant hybridisation for livestock is difficult to accomplish as hybrids are usually sterile. Hybrid animals are extremely difficult to produce and specialists often spend their careers attempting to create a new breed of animal. Hybridisation is plant species is more common and has a greater success rate than animal species, however successfully creating a hybrid species remains difficult to achieve. Specialists are trained on the gene sequence and different methods for accomplishing hybridisation. The development of hybrid flora and fauna is often undertaken to address a problem or issue. For example, to address socio-economic challenges agricultural researchers may attempt to produce a species of chickens who lay lager eggs or cows who produce more milk. Hybridisation is also applied to address the challenges of a changing climate including producing crops that are more drought resistant. Due to the research and development of these hybrid species they are expensive to access and often not available in remote areas. Traditional breeds are pure individual species with no DNA alterations. They are often endemic to an area and because of this have evolved and adapted to the geophysical area they are found. Thus, traditional breeds are often found in certain areas, and through traditional knowledge have been incorporated into local farming systems for generations. With an increasingly globalised world, it is difficult to maintain distinct traditional breeds as trade in species, seeds etc. is increasingly prevalent. However, with a new focus and dedication of farmers and researchers to explore indigenous knowledge there is an increased focus on reinvigorating the incorporation of traditional breeds of both flora and fauna.

Technical Application

To effectively leverage hybridisation:

  • Step 1: Contact national extension and research as they are often working on developing new species of flora and fauna to meet local challenges including climate variance and introduce them to local farmers.
  • Step 2: Research best methods applied to the practice of hybridisation in the region.
  • Step 3: Meet with national agricultural extension and research staff as well and local breeders to determine desirable characteristics and possible  crossing of livestock differing in heredity. For example, the mating of two different goat breeds to obtain an improved breed.
Return on Investment Realisation Period
Crop Production
Fodder Production
Farm Income
Household Workload
Food Security
Soil Quality/Cover
Biological Diversity
Flooding
Crop/Livestock Water Availability
Wind Protection
Erosion Control
Increase Production
Increased the milk yield or weight gain of animals, thus increasing the amount of food that farmers can produce within available resources.
Increase Resilience
Breeding for resilience to: Pests/disease; and Heat and drought
PDF File
/sites/secondsite/files/tb/CCARDESATechnicalBrief_49_HybridisationTraditionalBreeds_2019-10-17_0.pdf
Benefits and Drawbacks

Benefits

  • This agricultural practice is widely used in breeding to increase growth rate, manipulate sex ratios, produce sterile animals, improve flesh quality, increase disease resistance and improve environmental tolerance.

Drawbacks

  • This agricultural practice is widely used in breeding to increase growth rate, manipulate sex ratios, produce sterile animals, improve flesh quality, increase disease resistance and improve environmental tolerance.

Manure Collection, Storage and Treatment

Value Chain
Climatic Zone
Decision Making
Farming Characteristics
Mechanisation
Labour Intensity
Initial Investment
Maintenance Costs
Access to Finance/Credit
Extension Support Required
Access to Inputs
Access to Markets
Gender/Youth Smart
Description

Manure is organic matter that is used as an organic fertiliser in agricultural practices, conditioning and adding nutrients to soil, generally derived from animal faeces. Manure is the best source of fertiliser available to a farmer, as it can be readily available from livestock, and it a more environmentally friendly option over synthetic fertilisers. Animal manure, compost and green manure are the three different types of manure used in soil management. Manure is collected in different forms: liquid manure, slurry manure or solid manure, and treated in different systems depending on its state. Liquid and slurry manure are stored in liquid (slurry) manure storage systems whereas solid manure is stored in sacks in order to allow air and toxic vapours to move in and out, as well as to maintain the moisture content. The manure is collected and treated (as described below) in order to kill pests that may feed on crops during the application period. The manure is further cleaned to remove unwanted substances such as sticks, and large lumps formed in the manure.

Technical Application

To effectively implement manure collection, storage and treatment:

  • Step 1: Use gloves before handling animal manure from any livestock.
  • Step 2: Use shovels and wheel barrows to load and transport the material.
  • Step 3: Store manure in a contained area, with a solid bottom (cement pad) to prevent runoff and leaching into local waterbodies or groundwater.
  • Step 4:  Mix all types of manure with organic substances such as vegetable waste, garden debris, dead leaves, sawdust, wood ash, hay and straw etc. to add structure and other organic compounds to the soil.
  • Step 5: Turn mixed manure over regularly to allow for combining of nutrients and further aeration.
  • Step 6: Cut-up large particles of animal manure to no more than 10 cm in size.
  • Step 7: Spread manure evenly on field a few weeks prior to planting or during planting. It can also be applied in micro-doses around crops and trees directly.
Return on Investment Realisation Period
Crop Production
Fodder Production
Farm Income
Household Workload
Food Security
Soil Quality/Cover
Biological Diversity
Flooding
Crop/Livestock Water Availability
Wind Protection
Erosion Control
Increase Production
Organic matter in manure can be used to fertilise crops, improving soil health and productivity.
Increase Resilience
Manure collection and management can contribute to crop production.
Additional Information
PDF File
/sites/secondsite/files/tb/CCARDESATechnicalBrief_48_ManureCollectionStorageAndTreatment_2019-10-17_0.pdf
Benefits and Drawbacks

Benefits

  • The use of manure helps to maintain the organic-matter content of the soil, which can improve soil structure, increases nutrient availability and crop productivity.
  • An additional benefit is that it increases soil carbon and reduces atmospheric carbon levels.
  • Manure application can be spread across fields or in micro-doses.

Drawbacks

  • Manure leachate can carry concentrated ammonia and other potentially harmful organic compounds. Therefore, it should be contained in one area to prevent possible negative environmental impacts from runoff.

Physical Storage Options

Value Chain
Climatic Zone
Decision Making
Farming Characteristics
Mechanisation
Labour Intensity
Initial Investment
Maintenance Costs
Access to Finance/Credit
Extension Support Required
Access to Inputs
Access to Markets
Gender/Youth Smart
Description

Grains are stored to reduce the opportunities for loss, damage or infestation by pests. On the farm grain storage can be short-term (>3 months) before it is moved to the supply chain, long term (3-12 months) while farmers store it for home consumption, to sell when prices are more favourable or for planting in the next season. During this phase of post-harvest processing, grains can be stored in bags, silos or other bulk storage containers. Bag storage utilises permeable sacks that will allow air movement in and out of the bag. Structures can be built to store grains and solid-wall bins or silos should be used in areas where grains can be dried properly. Other options include airtight underground pits, steel bins, while concrete silos and warehouses can also be used as storage options. While storing grains to ensure favourable storage, facilities should be kept clean, covered, and never exposed to the elements.  However, pest control measures need to be established, such as adhering to acceptable grain moisture content levels at storage to deter insect infestation, as pests (rodents, insects, etc.) can devastate grains in storage. Physical storage options are built to meet the demand and supply of grains season-to-season and to make seeds available for the next planting season.

Technical Application

To effectively implement Physical Storage Options:

  • Step 1: When making a choice of which storage option to choose, farmers must consider the type of crop to be stored, storage requirements of the crop and the form in which the crop must be stored (for 0-6months/3-12months).
  • Step 2: Grains must be stored in a dry place with a constant temperature.
  • Step 3: Crops should be dried and have low moisture content prior to storage.
  • Step 4: Airtight containers should be used to avoid insect infestation.
  • Step 5: Based on farmer resources and time of storage, there are a number of containers that can be utilised to store harvested crops including metal silos, polythene sacks (that can be layered), mud silos, plastic bags.
  • Step 6: As a last measure, insecticides in the form of a powder can be applied to harvested crops. The powder comes in pre-measured packets and are low dosage so generally safe to handle. Information is provided on each packet and should be read before integrating it into the crop. Grain needs to be cleaned before consumption.
Return on Investment Realisation Period
Crop Production
Fodder Production
Farm Income
Household Workload
Food Security
Soil Quality/Cover
Biological Diversity
Flooding
Crop/Livestock Water Availability
Wind Protection
Erosion Control
Increase Production
Reduces losses during storage.
Increase Resilience
Storage that is protected from flooding, extreme rain and heat will protect grain. Potential to store until prices are higher and increase income.
Mitigate Greenhouse Gas Emissions
More efficient use of resources.
Additional Information
PDF File
/sites/secondsite/files/tb/CCARDESATechnicalBrief_39_PhyscialStorageOptions_0.3_2019-07-18_0.pdf
Benefits and Drawbacks

Benefits

  • Storage options can support food security and assist farmers respond to supply and demand, leveraging favourable market prices and conditions.
  • Suitable for short- and long-term storage.

Drawbacks

  • Uncontrolled grain moisture may lead to insect infestation and loss in grain.
  • Insect fumigation may contaminate grains.

Drying Techniques

Value Chain
Annual Average Rainfall
Climatic Zone
Decision Making
Farming Characteristics
Mechanisation
Labour Intensity
Initial Investment
Maintenance Costs
Access to Finance/Credit
Extension Support Required
Access to Inputs
Access to Markets
Gender/Youth Smart
Description

Drying techniques are agricultural practices applied to assist with the balance of moisture in grains post-harvest, determined by a combination of ambient temperature and relative humidity. Spoiling due to insufficiently dried grain is one of the main causes of grain deterioration, loss in grain quality, and thus market value. Grains have the capability to absorb or evaporate moisture, and a balance of moisture content in the air and grains should be sought to achieve an Equilibrium Moisture Content (EMC). EMC prevents the formation of moulds that may affect the quality of grains, spread of pests and germination of grain seeds. After harvest, transportation and threshing, grain needs to be further dried to be preserved. Natural drying techniques are based on ambient air circulation to reduce the moisture content of the grain before storage. Artificial drying techniques apply fans and/or heating elements to move air and maintain constant temperatures .Natural drying (sun drying) is the preferred, commonly used agricultural technique in southern Africa and does not require use of machinery. Drying techniques preserve the contents of seeds thus assuring sustainable agricultural productivity and the practice as climate smart.

Technical Application

To effectively implement Drying Technique practices:

  • Step 1: Harvest crops.
  • Step 2: Consider the number of different crops that need to be dried.
  • Step 3: Dry the crops naturally using air temperature or direct sunlight or artificial drying through using fans or other mechanical means.
  • Step 4: Never place crops directly on the soil but rather on a cement area, woven mats or a layer of sacks.
  • Step 4: Livestock should be kept away from drying grains to prevent contamination and loss.
  • Step 5: Farmers should consult storage life charts that will help determine dry crop characteristics and approximate times for drying.
  • Step 6: Cover all drying grain at night to prevent loss or damage.
  • Step 7: Sorghum should be left on the seed, maize should be de-husked and left on the cob, grain and pulses are normally left in their pods.
  • Step 8: Monitor the stored grain by checking at least every two weeks.
Return on Investment Realisation Period
Crop Production
Fodder Production
Farm Income
Household Workload
Food Security
Soil Quality/Cover
Biological Diversity
Flooding
Crop/Livestock Water Availability
Wind Protection
Erosion Control
Increase Production
Reduces potential losses of ripened grain.
Increase Resilience
More grain of a higher quality to consume and sell.
Additional Information
PDF File
/sites/secondsite/files/tb/CCARDESATechnicalBrief_38_DryingTechniques_2019-10-17_0.pdf
Benefits and Drawbacks

Benefits

  • Prevents loss in grain quality.
  • Outside on a flat surface, drying system costs less.
  • The drying crib system can be used for many years.
  • Forced air/hot air dryer systems are not weather dependent.

Drawbacks

  • Imbalanced EMC leads to low quality seed, possible mould/decay and possible germination of grain seeds.
  • The natural drying technique is not suitable for humid climates as EMC is difficult to achieve without artificial drying.

Changing Harvest Time

Value Chain
Climatic Zone
Decision Making
Farming Characteristics
Mechanisation
Labour Intensity
Initial Investment
Maintenance Costs
Access to Finance/Credit
Extension Support Required
Access to Inputs
Access to Markets
Gender/Youth Smart
Description

Changing harvest time refers to adjusting harvest time to focus on optimal moisture conditions, thereby avoiding losses from mould, decay and possible disease, while also considering optimal maturity of the crop. This approach encourages the reduction in potential losses of ripened grain and increases potential higher quality grain for consumption or market. Harvesting of crops when physiologically mature can minimise losses during transportation to the homestead. Physiological harvesting refers to the time when a grain (fruit, etc.) can be separated from its parent plant and continues to ripen over time. Farmers should consider planting earlier or later or consider planting faster or slower maturing varieties to avoid issues of post-harvest loss. This is a climate smart practice because it reduces potential losses of ripened grain, increase the quality of grain harvested, and is overall a more efficient use of resources, all while mitigating the spread of diseases and reducing GHG emissions.

Technical Application

To effectively implement Changing Harvest Time practices:

  • Step 1: Consider researching recent rainfall records and consult national meteorological services to as accurately predict start of rainy season as possible.
  • Step 2: Farmers should consult data provided by the African Post Harvest Loss Information System (APHLIS), which provides information on harvest loss and additional resources to consult.
  • Step 3: Consult with national agricultural extension and research to determine growing periods of chosen crops. Request information about quicker or slower maturing seeds.
  • Step 4: Plant crops at the right time so as to avoid harvesting during rainy season.
  • Step 5: Harvest as soon as crops are physiologically mature.
  • Step 6: Wait 24 hours after a rain period to harvest if rain is unavoidable. This may take several days, however, harvesting crops after one rain is better than leaving it for an entire rainy season.
  • Step 7: Crops should be transported to the storage for immediate drying.
Return on Investment Realisation Period
Crop Production
Fodder Production
Farm Income
Household Workload
Food Security
Soil Quality/Cover
Biological Diversity
Flooding
Crop/Livestock Water Availability
Wind Protection
Erosion Control
Increase Production
Reduces potential losses of ripened grain.
Increase Resilience
More grain of a higher quality to consume and sell.
Mitigate Greenhouse Gas Emissions
More efficient use of resources.
Additional Information
PDF File
/sites/secondsite/files/tb/CCARDESATechnicalBrief_37_ChangingHarvestTime_2019-10-17_0.pdf
Benefits and Drawbacks

Benefits

  • Reduces the potential loss of ripened grain and increases potential higher quality grain for consumption or market.
  • It improves crop production, food security and farm income.

Drawbacks

  • Moisture from rainfall at harvest time can risk crop degradation post-harvest, due to mould, decay and disease.
  • Different crops have different growing seasons, and this should be known and monitored constantly, specifically as climate change has been shown to alter growing seasons, which will in turn impact harvesting times.

Best Practice Harvesting Techniques

Value Chain
Climatic Zone
Decision Making
Farming Characteristics
Mechanisation
Labour Intensity
Initial Investment
Maintenance Costs
Access to Finance/Credit
Extension Support Required
Access to Inputs
Access to Markets
Gender/Youth Smart
Description

Best Practice Harvesting Techniques are formalised harvesting practices intended to reduce breakage and bruising of crops during collection and storage. These techniques minimise harvest losses and maintain the quality of the produce. To maximise this approach, factors such as moisture content, cleanness of the grain, colour, odour and potential pest infestation need to be considered during harvest periods. Considering each of these factors will increase grain value as quality standards are directly related to grain price. Harvesting can be performed manually or mechanically, with obvious cost implication of employing the latter.

Technical Application

To effectively implement Best Practice Harvesting Techniques:

  • Step 1: Obtain equipment and supplies needed for the harvest and post-harvest activities, e.g. clean sacks, drying mats, etc.
  • Step 2: Allocate drying and threshing areas, ensuring the areas are swept, dry, and there is no/limited access for livestock or rodents. If in a dry climate or season, drying outside is optimal. If necessary, construct drying cribs elevated from the ground with rodent guards on legs can reduce access for rodents.
  • Step 3: Allocate sufficient storage space for the harvested crop.
  • Step 4: Clear weeds from the farm to prevent weed seeds from contaminating the harvest.
  • Step 5: Place the harvested crop directly onto clean mats and bags to avoid contact with the soil, which may lead to moisture uptake and also prevent contamination with tiny Striga.
Return on Investment Realisation Period
Crop Production
Fodder Production
Farm Income
Household Workload
Food Security
Soil Quality/Cover
Biological Diversity
Flooding
Crop/Livestock Water Availability
Wind Protection
Erosion Control
Increase Production
Reduces potential losses of ripened grain.
Increase Resilience
More grain of a higher quality to consume and sell.
Mitigate Greenhouse Gas Emissions
More efficient use of resources.
Additional Information
PDF File
/sites/secondsite/files/tb/CCARDESATechnicalBrief_36_BestPracticeHarvestingTech_2019-10-17_0.pdf
Benefits and Drawbacks

Benefits

  • Best practice harvesting techniques improve grain quality and minimise post-harvest loses.

Drawbacks

  • Lodging can cause significant losses as well as contamination.

Boundary Planting

Climatic Zone
Decision Making
Farming Characteristics
Mechanisation
Labour Intensity
Initial Investment
Maintenance Costs
Access to Finance/Credit
Extension Support Required
Access to Inputs
Access to Markets
Gender/Youth Smart
Description

Boundary planting, also known as live fence planting, is a technique used to protect crops from the interference of people and animals that can disturb plant growth. Trees/shrubs are a good example of this approach as they can form a shield when planted along the boundaries of the garden or surrounding a planted field. The trees/shrubs act as wind break to shield plants against strong winds causing physical damage to plants themselves, or the removal of soil (erosion). Additional benefits include the use of branches for firewood or building materials, and the other parts of trees can be used as fodder, fruit or leave harvested for consumption, or for medicinal use. Tree/shrub spacing is critical, as trees that have dense canopies can conversely cause destructive down-drafts, negating the intended benefits. Boundary planting helps limit global warming by mitigating GHG emissions through reducing harmful gases such as, carbon dioxide, from the atmosphere and releasing oxygen.

Technical Application

To effectively implement Boundary Planting practices:

  • Step 1: Plant long lines of two fast growing trees, Caesalpinia velutina trees, between a Bombacopsis quinate and a Swietenia humilis to be replaced over time.
  • Step 2: Consider planting the boundary trees 1.5 metres apart along pre-existing fences.
  • Step 3: Attach metal fencing to the trees to support the large trees without endangering their growth. Harvest fodder when the tree is overgrown.
  • Step 4: Prune lower brunches to encourage upward growth of trees and reduce shed on the plants.
Return on Investment Realisation Period
Crop Production
Fodder Production
Farm Income
Household Workload
Food Security
Soil Quality/Cover
Biological Diversity
Flooding
Crop/Livestock Water Availability
Wind Protection
Erosion Control
Increase Production
Increases availability of tree shrub products (nuts, fruits, timber etc.) and biomass, which improves soil fertility, and thus production.
Increase Resilience
Reduces erosion of soil and evaporation. Increases water retention and infiltration. Diversifies income sources. Improves yield stability.
Mitigate Greenhouse Gas Emissions
Locks more carbon in plants and in the soil.
Additional Information
PDF File
/sites/secondsite/files/tb/CCARDESATechnicalBrief_33_BoundaryPlanting_2019-10-17_0.pdf
Benefits and Drawbacks

Benefits

  • Live fence planting is cost effective, conserves soil moisture, acts a windbreak and reduces soil erosion. These trees have various benefits such as medicinal use, mulch, livestock feeds, fruits, bee forage, timber and firewood.
  • Maintenance of boundary trees is low with short, medium and long ecological and economic benefits.

Drawbacks

  • Boundary planting occupies more land than a single row.
Subscribe to Positive

Funding Partners

4.61M

Beneficiaries Reached

97000

Farmers Trained

3720

Number of Value Chain Actors Accessing CSA

41300

Lead Farmers Supported